|
 |
|
Chroming Project - C-3PO |
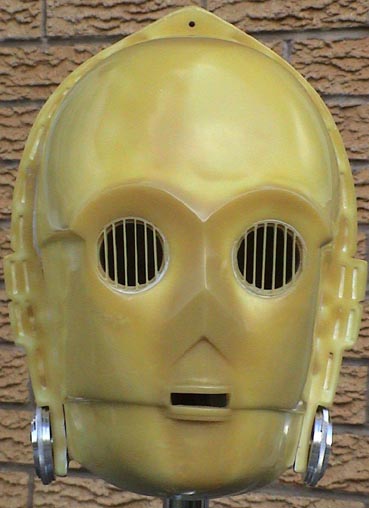
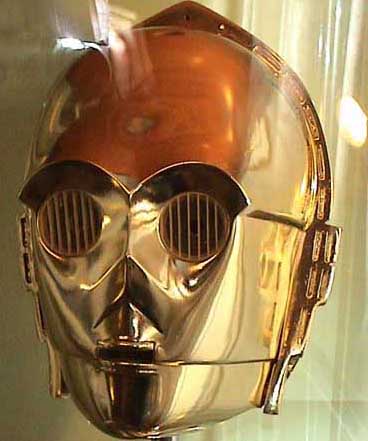
| So, you get your nice new
C-3PO
head. All you need to do is get it
plated nice and shiny gold like this.
Should be a piece of cake, right? |
|
|
| WRONG!. Plating is an extremely
difficult process!!!!!!!!!!!!!! |
|
|
|
Essentially there are three techniques:
1) "Proper" immersive Chroming / electroplating - After
discussing this with a number of factories in the UK my understanding of
this is only a very limited number of plastics will work with it as the overall process is so
aggressive.
2) FantaChrome / Cosmic Chrome - 3 part spraying technique similar to
mirrors. Looks great according to the sales literature but I've not had
anyone tell me that they've had great results from it.
3) Vacuum-Metalising - The most widely used technique and is common on
a number of household goods and toys. If you've got anything at home thats
made of plastic with a chrome finish then chances are its been VM'd.
So given a number of constraints I went down route 3, Vacuum Metalising
and have found a factory in the UK which specialise in this field doing a
considerable amount of work for businesses in the area including the Local
Authority where they produce the reflective "mirrors" used in
traffic lights/signals, they've also produced some helmets for the upcoming Brad Pitt/Orlando Bloom movie
"Troy".
The process for VM is 4 stages. Firstly a base lacquer is applied to
the prob. Secondly its baked in the oven at 60-70 degrees. Stage 4 is the
chroming part where the prop is placed in a Vacuum chamber and is
bombarded with vaporised Aluminum, and finally a top lacquer is applied,
and in the Case of C-3PO it has a Gold tint. Sounds easy?
REMEMBER - ANY kind of Silicone contamination will destroy the finish of your
prop - leaving an "Orange Peel" type finish also
reminiscent of oil on water. Essentially Silicone acts as a barrier (as
its a perfect lubricant) stopping the lacquer adhere to your prop. You can
not "remove" silicone if its on (or in) your prop and believe me
I have tried every so called "Silicone Remover" possible!
Therefore if you use a silicone release agent, or a silicone mould
itself then you are going to have serious problems. For this project the
mould was made from Silicone and as is often the case the Silicone from
the mould has cross-contaminated the helmet.
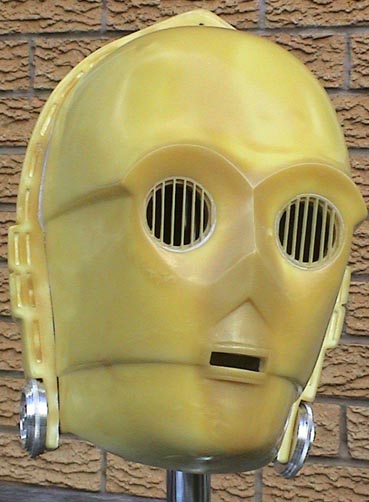
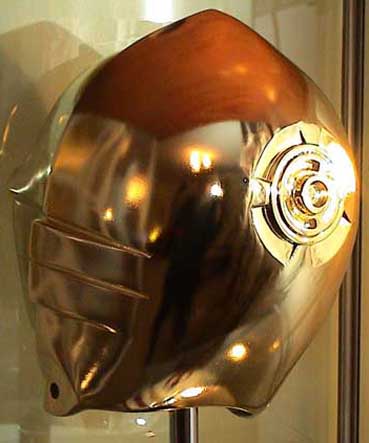
Below, the Raw helmet |
|
|
 |
|
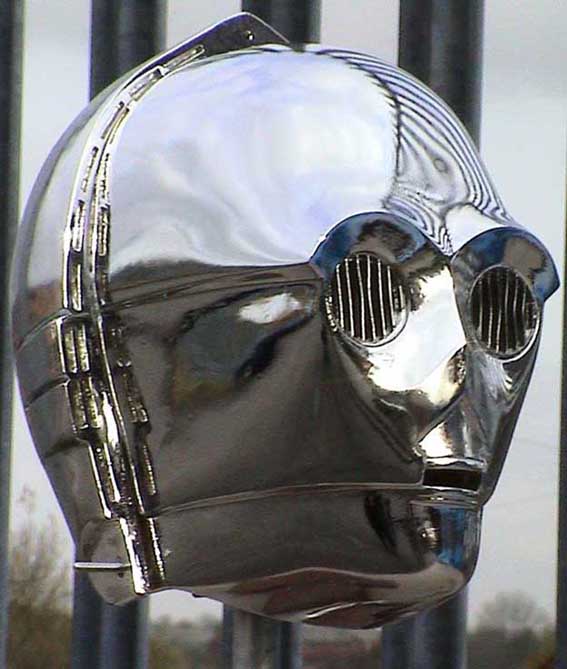
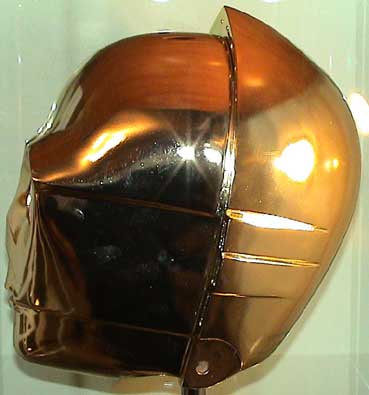
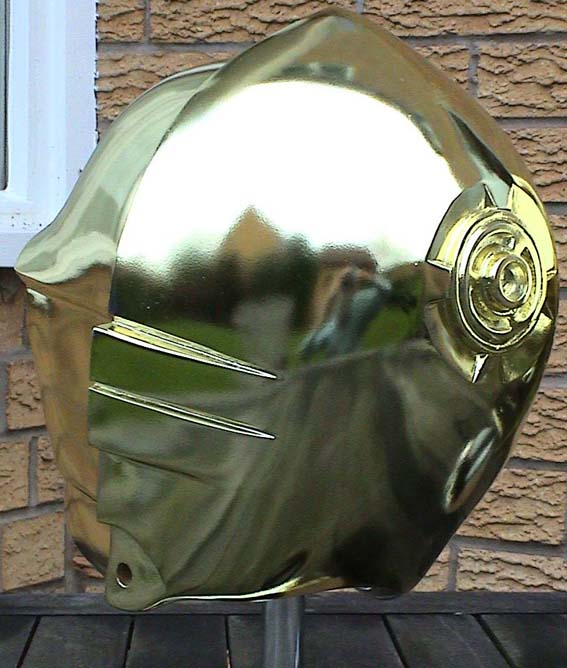
Here's my first attempt. On this photo it probably looks better than it actually is. Its not yet
had the top lacquer so it looks more like TC-14 but you get the impression
of what the chroming finish is like. |
|
|
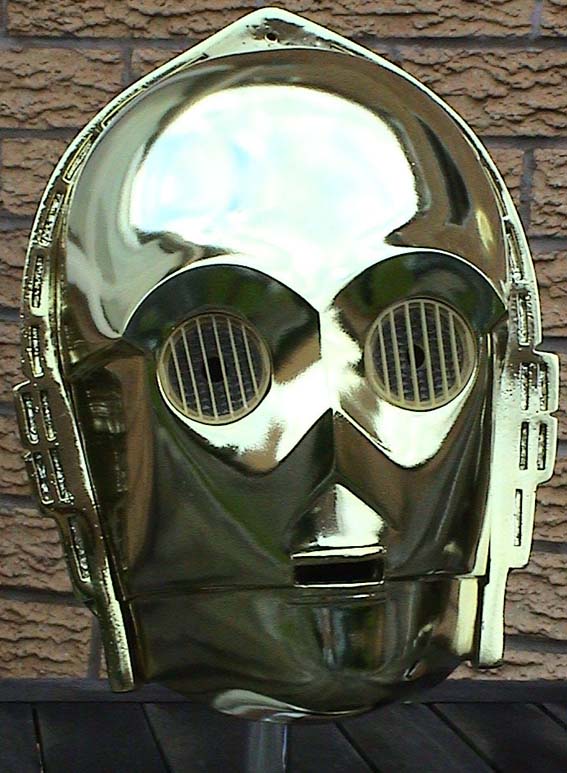
| The finish on the majority of the helmet is
excellent, but unfortunately the Silicone contamination has crept in over
a number of places leaving a less than satisfactory finish. True that this
could be covered up with weathering for an "Tattooine ANH" look,
but Ideally I've been striving for the perfect finish. |
|
|
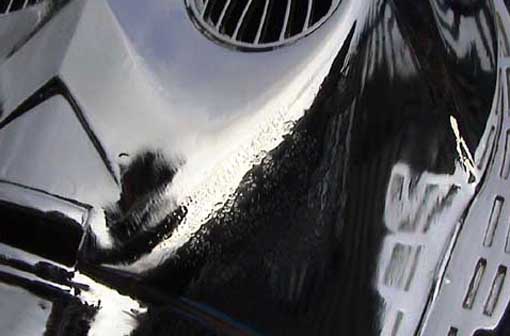
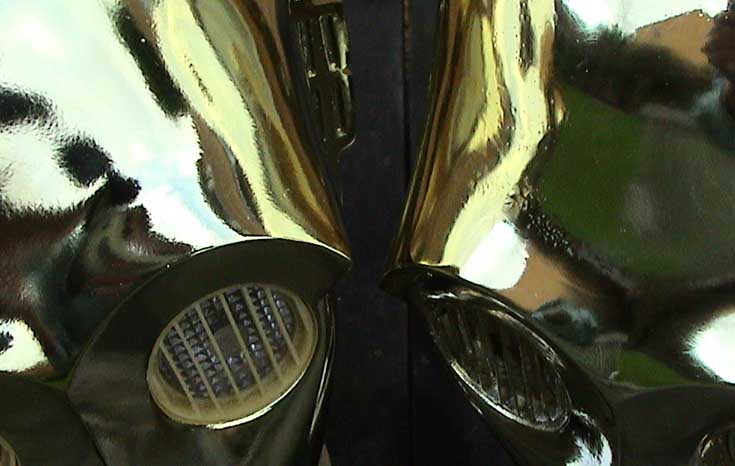
| Below a close-up where you can see the
"Orange Peel" looks due to silicone deposits within the resin
itself contaminating the surface and reacting with the base lacquer
preventing complete adhesion. There's no sense in where the contamination
occurs, at least none that we could see. |
|
|
| To illustrate the "cleaning process"
this helmet has been through, it has:
1) Been cleaned with soapy water, sanded, washed again and cleaned in
IPA
2) Been VM'd (giving an appearance similar to above)
3) Been totally stripped down in a detergent and re-sanded.
4) Cleaned again in IPA, Mentholated Spirits and also a new German
"Super De-Siliconiser"
5) VM'd for a second time
So despite going through all this process the Silicone deposits are
still present on the prop. Effectively this prop has also been baked twice
so the idea that you can "bake out" silicates is incorrect.
It'll be interesting so see whether its possible to "seal the
contaminants in" with 2-pak. |
|
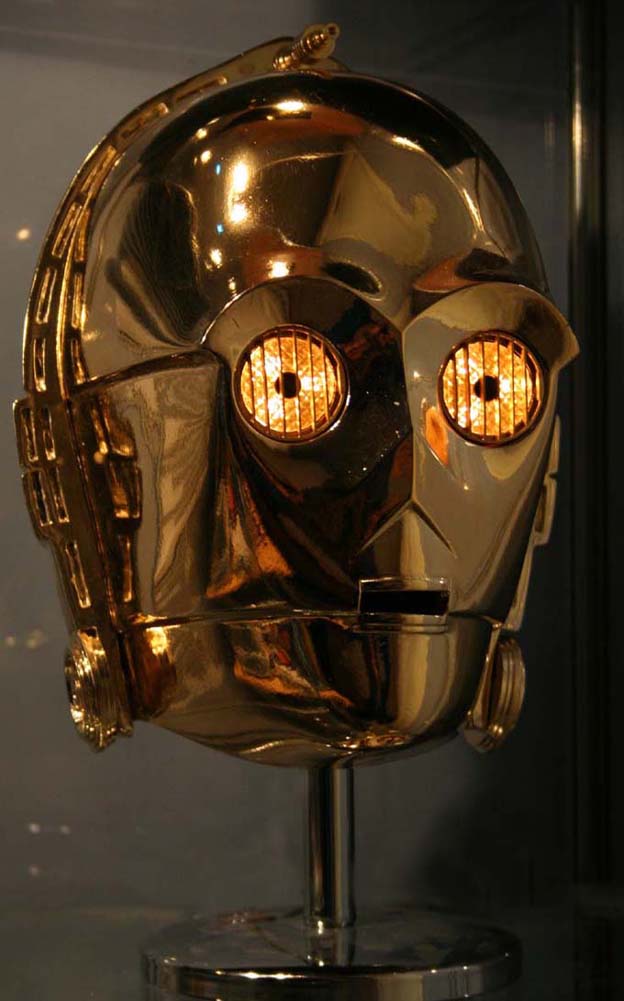
Update 6/7th December 2003 - Some Success!!!
|
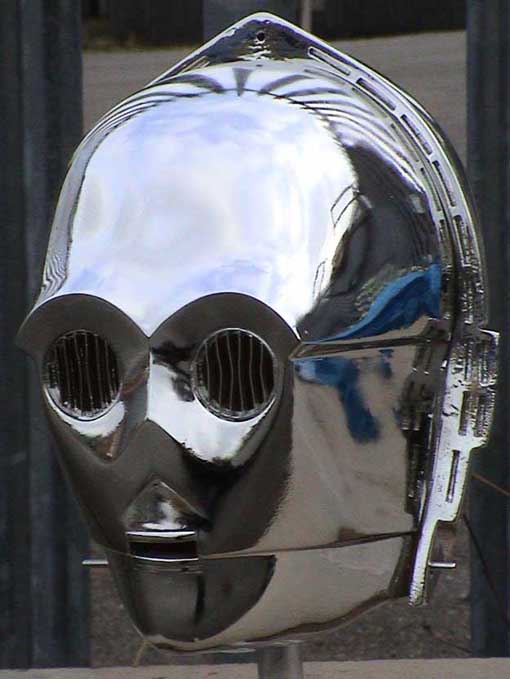
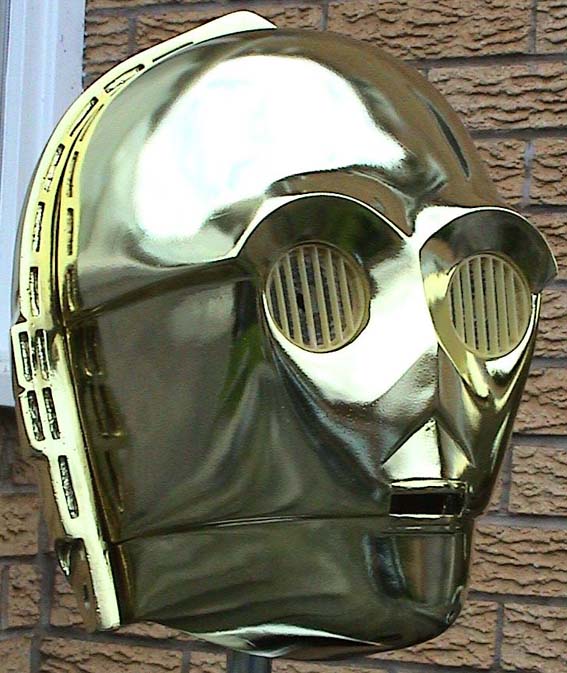
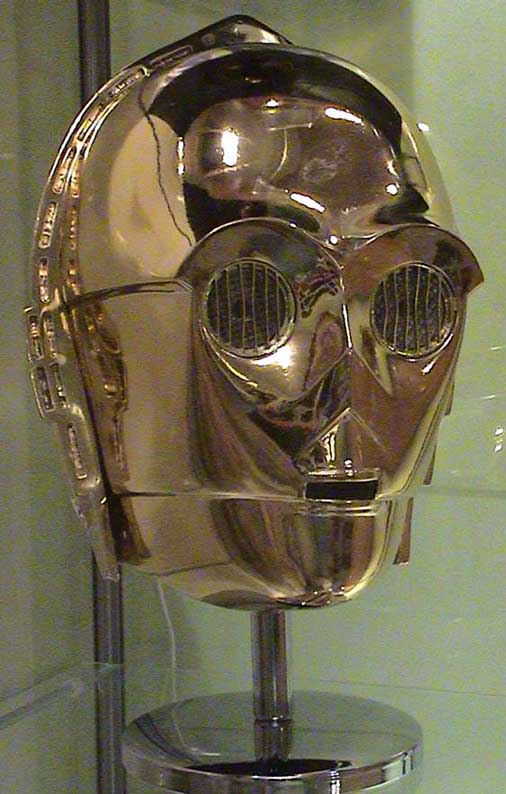
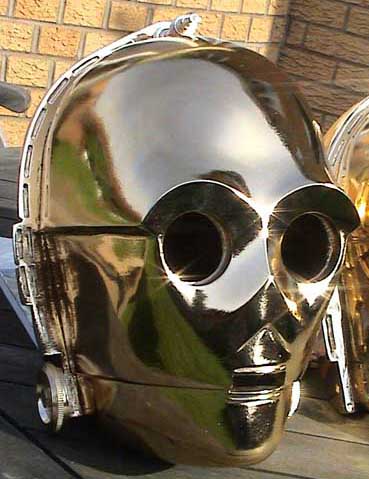
| Below a successful Vacuum metalised resin C-3PO
head. Following a number of tests I cleaned, sanded and then got a local
Auto spray center to apply a generous coat of 2-PAK PRIMER. Following this
it was lightly sanded, cleaned with IPA and then then went through the
standard 4-phase Vac Metal process. The results are awesome! |
|
|
 |
|
|
 |
| Though the 2pak primer makes the finished look
less "chromey", it does however ensure that the overall finish
is simply beautiful and imo totally authentic.
Regular contributor and all round good-guy Steve the Swede is
the fortunate owner of this beauty, as he sent the raw fiberglass helmet
to me to use as my second guinea pig!!! Lower down the page there's some
comparison shots of how the two approaches differ, but in the meantime
more pics of this excellent helmet, so now for some shots outside........ |
|
|
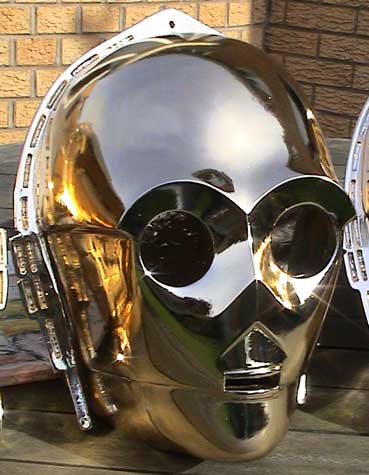
| As you can see it looks wonderful. Note that
the eyes are obviously unfinished and have just been placed in place temporarily
to give an indication of the finished look. Steve's going to hand paint
these in a brass colour to match the screen used prop. Also the head
antenna and neck bolts need to be VM'd note that this must be done
separately due to the high temperatures needed to VM metal parts. |
|
|
| As you can see from the back, the overall
effect is not so mirrored, but the key is the consistency of the
the metallising which is just perfect. |
|
|
| Unlike the first approach, there aren't patches
of contamination from the silicone and the overall effect is one of a gold
helmet, exactly the look we were after! |
|
|
Comparisons of the two approaches-
(i.e. with or without 2-pak
primer) |
|
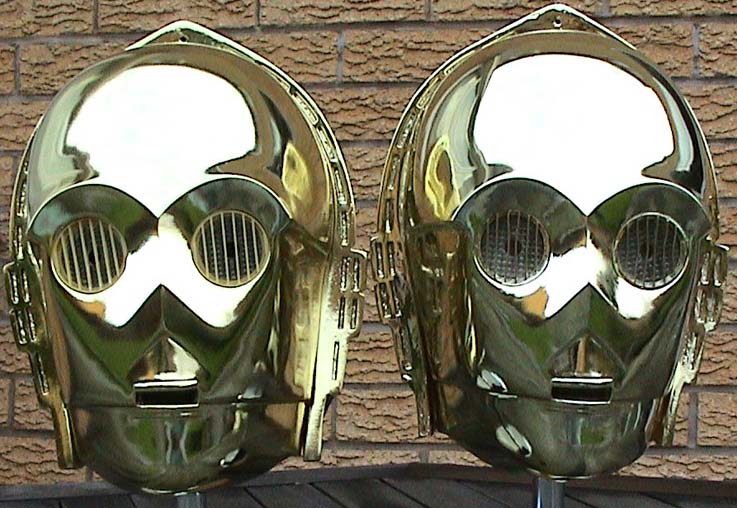
All the shots below feature the 2-PAK Primer on the
LEFT, with NO 2-Pak Primer on the RIGHT. Note that the eyes on the helmet
on the right have been chromed whereas the left are unpainted resin. |
|
|
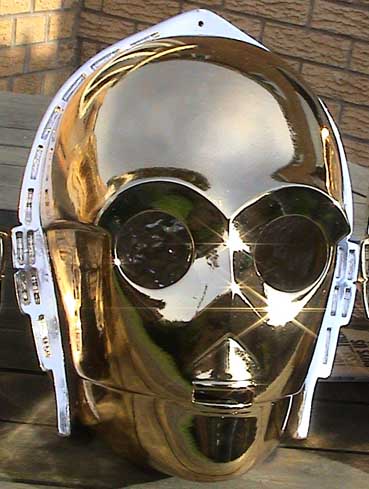
| Front on they both look good, with the one on
the right (NO 2Pak) looking more chromed/reflective and therefore lighter. |
|
|
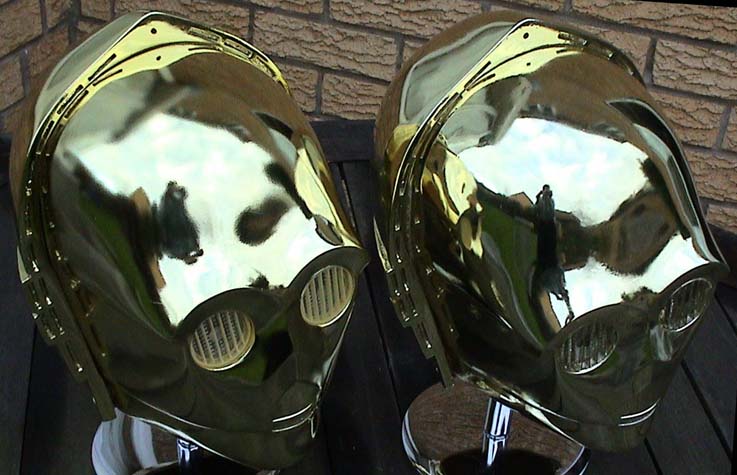
| and this reflective quality is further apparent
in this shot, especially if we look at my reflection. |
|
|
| Above, however its not until you get close up
(less that 18 inches or 0.5m) that you begin to notice the poor finish on
the NON-2Pak on the right helmet above the eye. TRUST ME, the finish on
this is not good enough and therefore I have no hesitation in recommending
using a 2-Pak primer before the Vacuum-Metalising process.
In addition I suggest EXACTLY the same approach as I took with Steve's
helmet namely,
1) The front and back half's were filled and sanded such that when put
together they fitted correctly without an obvious gaps.
2) As the eyes don't need to be VM'd (they can be painted with a copper
paint) they were removed.
3) The neck bolts and head antenna were not affixed but supplied such
that they cold be VM'd separately as a higher temperature (one that would
melt the helmet if done together).
4) the helmet was lightly sanded with 600-1000 grit wet and dry paper
5) The helmet was then given a "generous" spraying of 2-pak
primer to seal the silicone contaminants in. Following this it was very
lightly sanded with 1000 to ensure a clean smooth surface. However
Cyberman has suggested this be increased to 2000 Wet and Dry.
6) It was then cleaned with IPA, and bagged and then placed in a clean
bag.
7) At the VM factory it is mounted on a rig using the holes in the neck
to secure it to the rig which will later rotate the helmet inside the
Vacuum chamber. For this reason you cannot bolt to the halves together.
8) The VM Process begins with the application of a base lacquer
9) Its then baked on at 60C, the metal parts baked separately at a far
higher temperature and following this they are mounted on the same rig as
the helmets.
10) When cooled the rig is placed in the vacuum chamber where the Aluminum
strips are heated and vaporised as the helmets rotate around inside the
chamber. The gaseous Aluminum particles condensing on the helmets at a
thickness of just 1 thousandth of an inch.
11) After some time the helmets and metal parts come out of the VM
chamber looking silver. They are subsequently sprayed with a top lacquer
which has a gold tint giving the impression the whole helmet is made of
pure gold.
12) You paint the eyes and fix them in place and then bolt the two halves
together. You've finished! |
|
Update 16th March - Two
steps forward and one back? |
|
|
|
| Well I finally got the four helmets back from
the VM factory on Tuesday and the results were on the whole very good,
although not astounding. The gold finish achieved through the methodology
described above though very nice is still not what could be called a
"throne room" finish. |
|
|
| The one thing the 2Pak does though is eliminate
the "oil on water" problem where the base lacquer (vital for the
VM process) reacts with the surface of the helmet (or contaminants
within). |
|
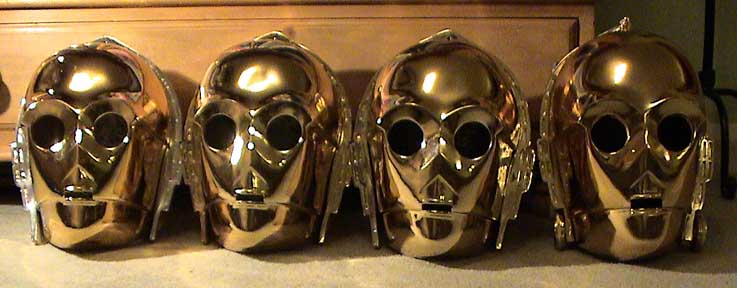 |
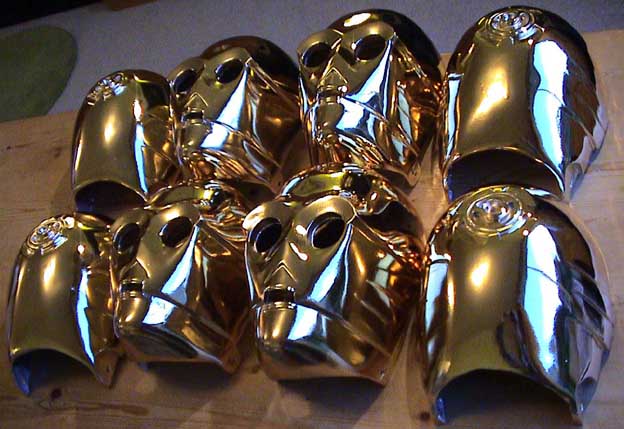
| These last two photos show the helmets in
different lighting conditions and below a shot of the unassembled helmets. |
|
|
|
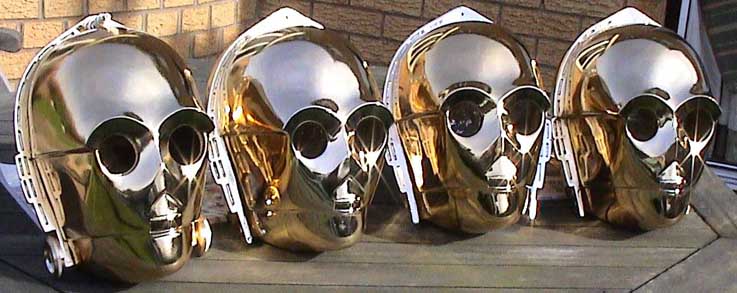
The following four shots are of different helmets from
the four that I had plated for Prop Board members (i.e. they are all
unfortunately spoken for!) |
|
|
 |
|

|
 |
| Overall the finish was very good although the
helmet lower right had a few marks on it so will most probably undergo the
entire process again. |