|
Making a Tusken Raider Mask
(from a Godzilla Kit) |
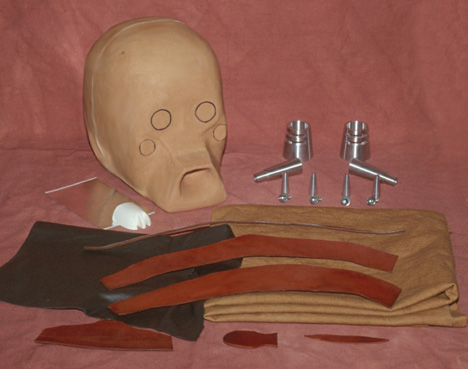
| I have to say that Godzilla's Tusken Raider kit
really is very good. It comes with the following pieces which is
everything you're going to need apart from glue ( a number of different
kinds of which you're going to need). You really don't need to have much model making experience to put
this together, I'm normally a NIGHTMARE at these kinds of things and even
I produced acceptable results! The instructions which come with the kit
are very good, but I've just added some photo's and tips in case its of
use to anyone.
July 09 Update - I've had a note from the
maker of these kits to say he's making them again so for more information
you can email him at
godzilla@ix.netcom.com |
|
|
| Like I said, everything is included and the kit
includes the necessary Aluminum parts, the leather for the inner mouth and
cowhide for the mouth surround. The mask itself has a real solid feel
about it due to the quantity of latex used. |
|
|
 |
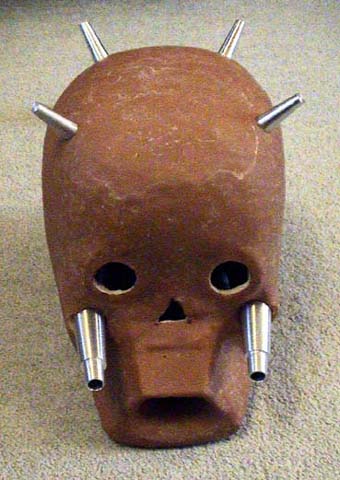
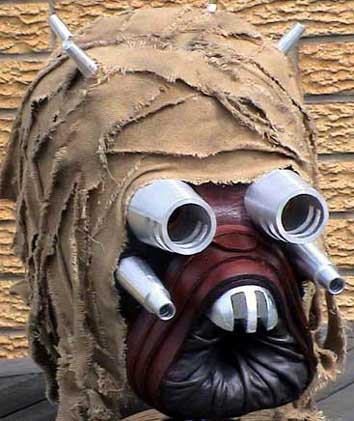
| Step 1 - Following the markings on the mask, I've cut out
the eyes, mouth and a triangular hole to provide a bit more nasal space
inside when wearing.
Step 2 - The top tusks are screwed from the inside (using the
pre-tapped screws provided) and the jaw tusks have just been pushed
through from the inside leaving a 0.25 inch overlap on the inside.
Carefully cut the holes out first (obviously!). |
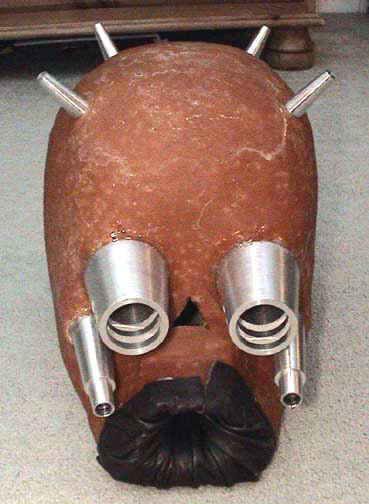
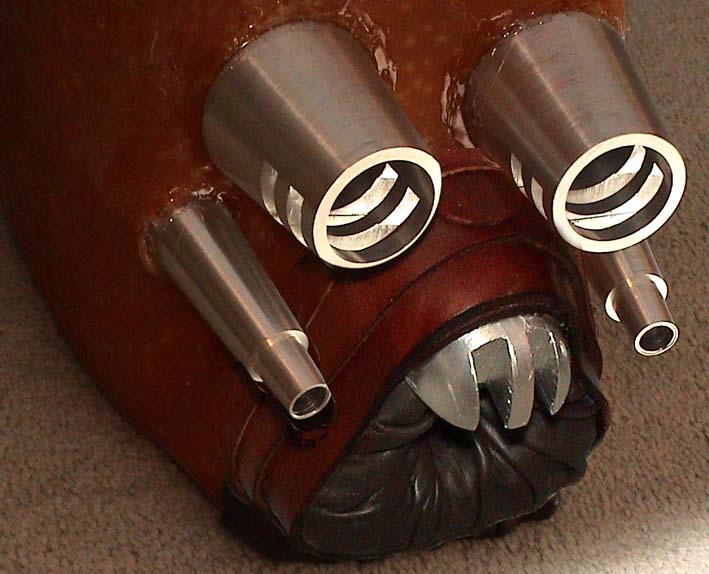
Step 3 - The heavy Aluminum "eyes" have been stuck
to the Latex mask using "Goop", a glue which sets like rubber
and was impossible to source in Europe (and according to the packet banned
in California!). The jaw tusks have been similarly "gooped".
Step 4 - I've applied the Lambs Leather around the mouth - a
single strip applied lengthways to the bottom and then worked around
the mouth piece, pushing the excess inside giving that creased look not
unlike a cows a$$hole (so I'm told)
|
| Step 5 - Remember to sand and prime the
"nose tooth" piece before applying the sticky foil to it or it
wont key. Following this you can glue it to the latex. |
|
|
Step 6 - This is the tricky bit. Applying the
layered Cowhide strips requires much trial and error. You have to use
fairly quick drying 2 part epoxy (e.g. Araldite) as the Cow hide,
displaying a mind of its own, keeps flipping back in a spring-like manor.
Strips "2" and "3" are by far the most difficult but
as long as you take your time then it's fine. Strip 4 goes between the
eyes and should be used earlier to ensure they were stuck on the correct
distance apart. |
|
Step 7 - Sticking the torn bandage strips on is
a lot of fun. The first piece of bandage encircles the face and all the early pieces are
all glued down quite flat whereas the later strips are attached more
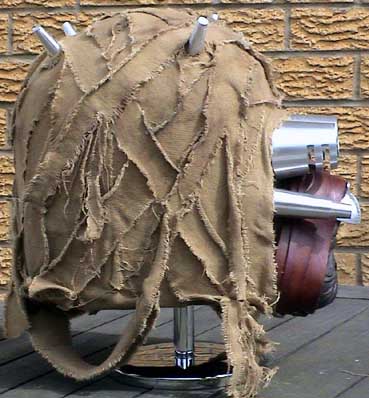
loosely and cris-cross each other in a more random fashion. The material
tears easily and pulling at the ends gives a nice frayed look All that's left now is to tidy up the bandages (they're
not quite right here and a bit too neat) and then to start the weathering
process. The great thing about the Tusken Rider is that it doesn't
matter if you make mistakes - it's not supposed to be perfect. |
 |
Step 8 - I added some more bandage,
although this time they're more loose and frayed to a greater
extent. Also make sure that the width is not the same (even on the
same strip by cutting and then fraying the sides and ends).
Step 9 - Use artists pastels (coloured chalks) to weather the mask.
I've ground the pastels down and applied them with my fingertips,
rubbing the dust in in patches. Sticking mainly to brown hues, but adding
a bit of grey and black I've tried to be subtle with the colouring so it
just looks dirty and used.
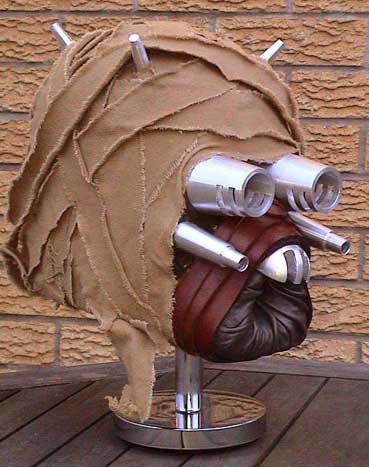
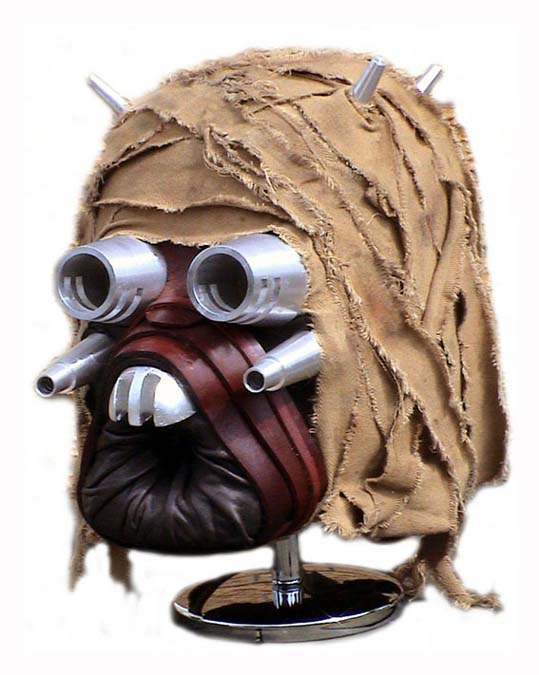
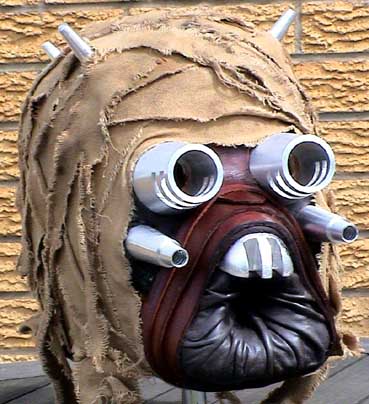
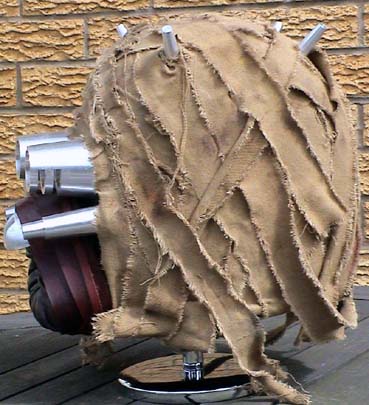
...AND HERE IT IS!!!
|
|
|
| I'm really pleased with the look, especially
when me a well-known prop-making nightmare is able to get results as
acceptable as this. Nice kit Godzilla!! |
|
|
 |
|
|
|
 |
| So if you're looking for a new project and
perhaps you're not the most advanced model or prop maker in the World then
this kit is just for you. It's brilliant fun to put together and I THOROUGHLY
RECOMMEND IT!!! |